Wednesday, December 28, 2016
Monday, October 3, 2016
Tuesday, June 28, 2016
How to Create Windows xp Mode In Windows 7
Step 1 : First Download Windows Xp Mode & Install
Download Link : https://drive.google.com/open?id=0ByLgYo2dzZ_TOUd4QWh1cXBjTWs
Step 2 : Download Windows Virtual Machine Install
Friday, May 13, 2016
Tuesday, May 3, 2016
First: Open an Administrator Command Prompt Window
To use this tool, you’ll want to launch a Command Prompt with
Administrator access. To do so on Windows 8 or 10, either right-click the
Start button or press Windows+X. Click the “Command Prompt (Admin)” option
in the menu that appears. On Windows 7, search the Start menu for “Command Prompt,”
right-click it, and select “Run as Administrator.”
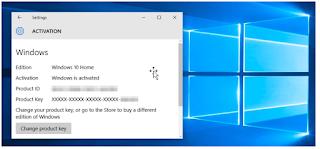
View Activation, License, and Expiration Date Information
To display very basic license and activation information about
the current system, run the following command. This command tells you the edition
of Windows, part of the product key so you can identify it, and whether the
system is activated.
slmgr.vbs
/dli
To display more detailed license information–including the
activation ID, installation ID, and other details–run the following command:
View the License Expiration Date
To display the expiration date of the current license, run the
following command. This is only useful for Windows system activated from an
organization’s KMS server, as retail licenses and multiple activation keys
result in a perpetual license that won’t expire. If you haven’t provided a
product key at all, it’ll give you an error message.
Uninstall the Product Key
You can remove the product key from your current Windows
system with Slmgr. After you run the below command and restart your
computer, the Windows system won’t have a product key and will be in an
unactivated, unlicensed state.
If you installed Windows from a retail license and would like to
use that license on another computer, this allows you to remove the license. It
could also be useful if you’re giving that computer away to someone else.
However, most Windows licenses are tied to the computer they came with–unless
you purchased a boxed copy.
To remove uninstall the current product key, run the following
command and then restart your computer:
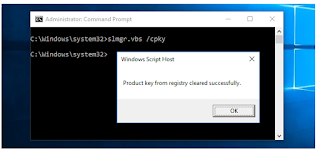
Windows also stores the product key in the registry, as it’s
sometimes necessary for the key to be in the registry when setting up the
computer. If you’ve uninstalled the product key, you should run the below
command to ensure it’s removed from the registry as well. This will ensure
people who use the computer in the future can’t grab the product key.
Running this command alone won’t uninstall your product key.
It’ll remove it from the registry so programs can’t access it from there, but
your Windows system will remain licensed unless you run the above command to
actually uninstall the product key. This option is really designed to prevent
the key from being stolen by malware, if malware running on the current system
gains access to the registry.
Set or Change the Product Key
You can use slmgr.vbs to enter a new product key. If the Windows
system already has a product key, using the below command will silently replace
the old product key with the one you provide.
Run the following command to replace the product key, replacing
#####-#####-#####-#####-##### with the product key. The command will check the
product key you enter to ensure it’s valid before using it. Microsoft
advises you restart the computer after running this command.
You can also change your product key from the Activation screen
in the Settings app, but this command lets you do it from the command line.
Activate Windows Online
To force Windows to attempt an online activation, run the
following command. If you’re using a retail edition of Windows, this will
force Windows to attempt online activation with Microsoft’s servers.
If the system is set up to use a KMS activation server, it will instead
attempt activation with the KMS server on the local network. This command can
be useful if Windows didn’t activate due to a connection or server problem and
you want to force it to retry.
Activate Windows Offline
Slmgr also allows you to perform an offline activation. To
get an installation ID for offline activation, run the following command:
slmgr.vbs
/dti
You’ll now need to get a a confirmation ID you can use to
activate the system over the phone. Call the Microsoft
Product Activation Center, provide the
installation ID you received above, and you’ll be given an activation ID if
everything checks out. This allows you to activate Windows systems without
Internet connections.
To enter the confirmation ID you’ve received for offline
activation, run the following command. Replace “ACTIVATIONID” with the
activation ID you’ve received.
slmgr.vbs
/atp ACTIVATIONID
Once you’re done, you
can use the slmgr.vbs /dli or slmgr.vbs
/dlv commands to confirm you’re activated.
This can generally be done from the Activation screen in the
Settings app if your PC isn’t activated–you don’t have to use the command if
you’d rather use the graphical interface.
Extend the Activation Timer
RELATED ARTICLE
You Don’t Need a Product Key to Install and Use Windows 10
Microsoft allows anyone to download Windows 10 for free and install it without a product key. It’ll keep working for...[Read Article]
Microsoft allows anyone to download Windows 10 for free and install it without a product key. It’ll keep working for...[Read Article]
Some Windows systems provide a limited time where you can use
them as free trials before entering a product key. For example, Windows 7
offers a 30-day trial period before it begins complaining at you. To extend this trial period and
reset it back to 30 days remaining, you can use the following command.As
Microsoft’s documentation puts it, this command “resets the activation timers.”
This command can only
be used several times, so you can’t indefinitely extend the trial. The number
of time it can be used depends on the “rearm count,” which you can view using
theslmgr.vbs /dlv command.
It seems different on different versions of Windows–it was three times on
Windows 7, and it seems to be five times on Windows Server 2008 R2.
This no longer seems to work on Windows 10, which is very lenient if you don’t provide it a product key anyway. This option still works on older versions of
Windows and may continue to work on other editions of Windows, such
as Windows Server, in the future.
slmgr.vbs
/rearm
Slmgr.vbs Can Perform Actions on Remote Computers, Too
Slmgr normally performs the actions you specify on the current
computer. However, you can also remotely administer computers on your
network if you have access to them. For example, the first command below
applies to the current computer, while the second one will be run on a remote
computer. You’ll just need the computer’s name, username, and password.
slmgr.vbs
/option
slmgr.vbs
computername username password /option
The Slmgr.vbs command has other options, which are useful for
dealing with KMS activation and token-based activation. Consult Microsoft’s Slmgr.vbs documentation for more details
Friday, April 22, 2016
Email Setting change
POP Account Setting
Incoming mail server : secure.yaajman.net
Outgoing mail server :
secure.yaajman.net
Incoming Port : 995
Check mark this server requires an encrypted connection (SSL)
Check mark this server requires an encrypted connection (SSL)
Outgoing server port no
: 587
Use the following type of
encrypted connection :TLS
IMAP Account Setting
Incoming mail server : secure.yaajman.net
Outgoing mail server : secure.yaajman.net
Incoming Port : 993
Check mark this server requires an encrypted connection (SSL)
Check mark this server requires an encrypted connection (SSL)
Outgoing server port no : 587
Use the following type of encrypted connection :TLS
Subscribe to:
Comments (Atom)


